
目錄
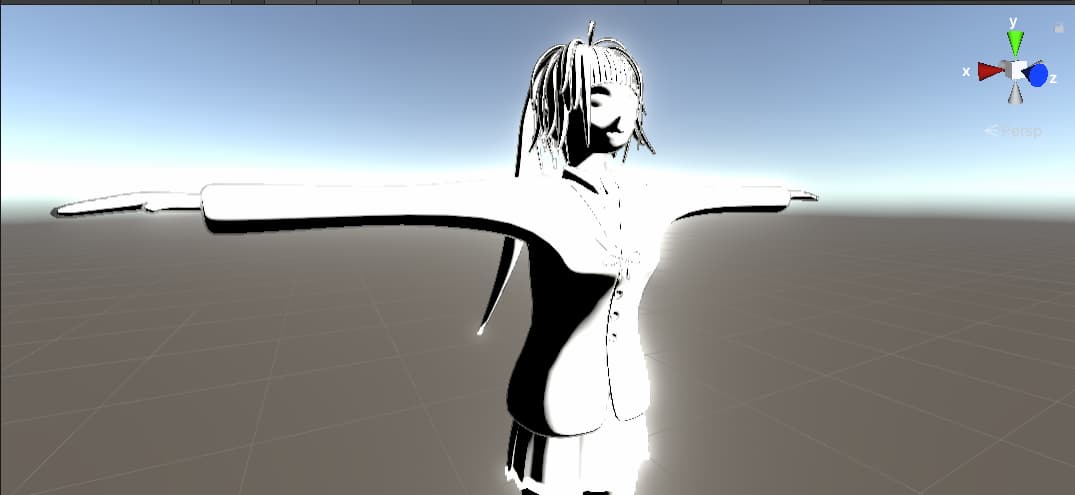
卡通材質其中一種常見作法就是使用Unlit材質,讓物件本身不受Unity的光影運算影響,然後用Code獲取光源向量及顏色,利用這些數值重新上色,算出自己想要的漸層、高光、陰影……等。
上色
暗面
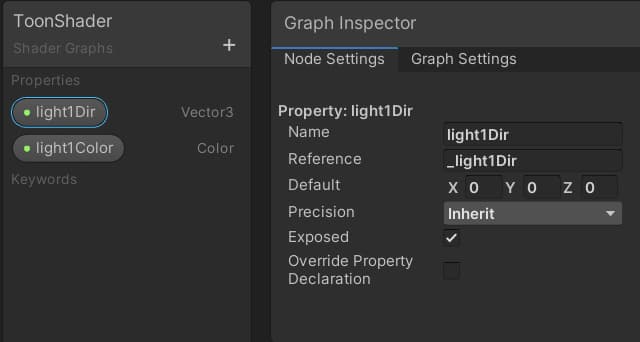
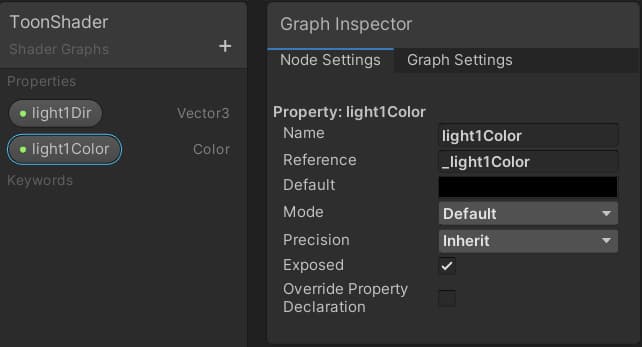
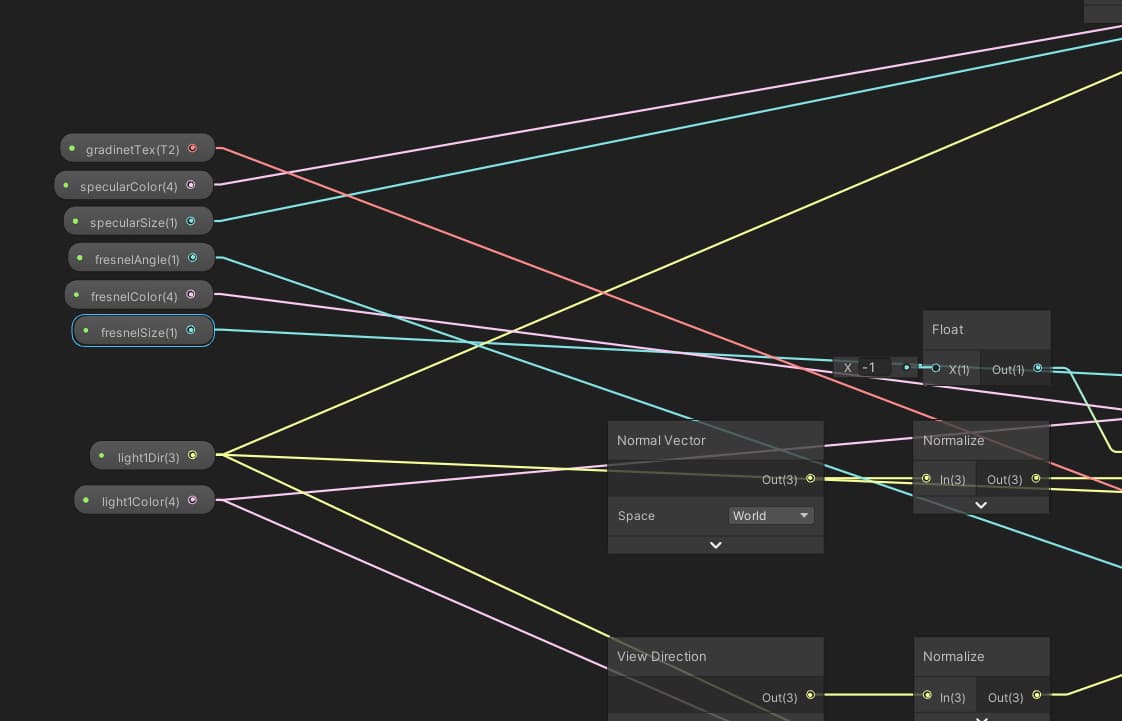
首先先從變數的宣告開始,分別控制一個光源的向量及顏色,Reference要記得命名,這樣之後才能用Code取得這個變數。
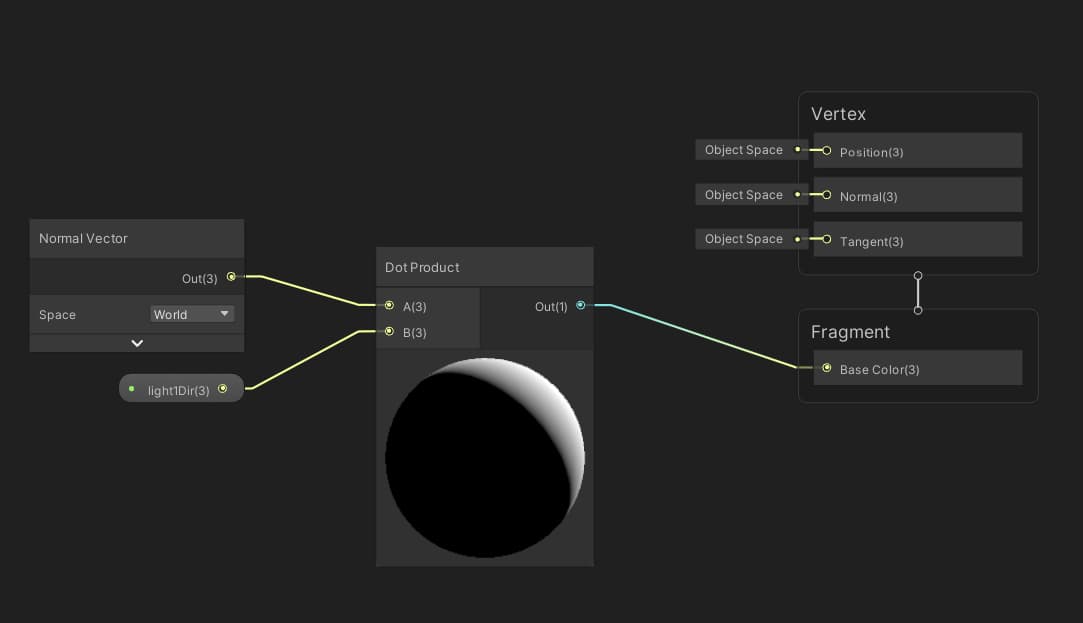
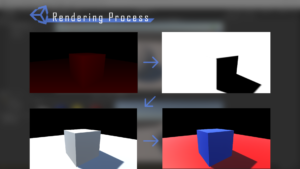
再來將光源跟normal做內積後就能看到模型會有明暗了。(用形狀較不規則、凹凸起伏較多的模型來做效果會較好) 至於為什麼要這麼做,可以回想一下內積的公式,當兩向量垂直則內積0。也就是說,表面平行於光源方向(normal&lightDir垂直),就會是黑色的(數值0);光源垂直表面入射(原則上要將光源向量Normalize,也就是變成單位向量),則呈現白色(數值1)。
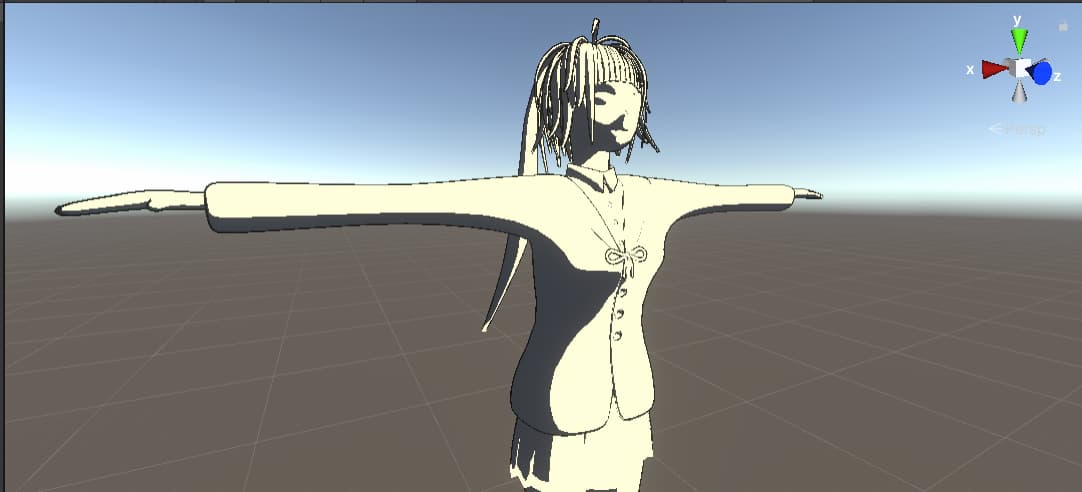
這段十分重要,製作卡通材質的第一步就是做出光影明暗。 當然還有一些問題,例如剛剛得出的陰影向量跟實際要的效果差了-1倍(不要從數值想,從空間座標系想就能明白了)。
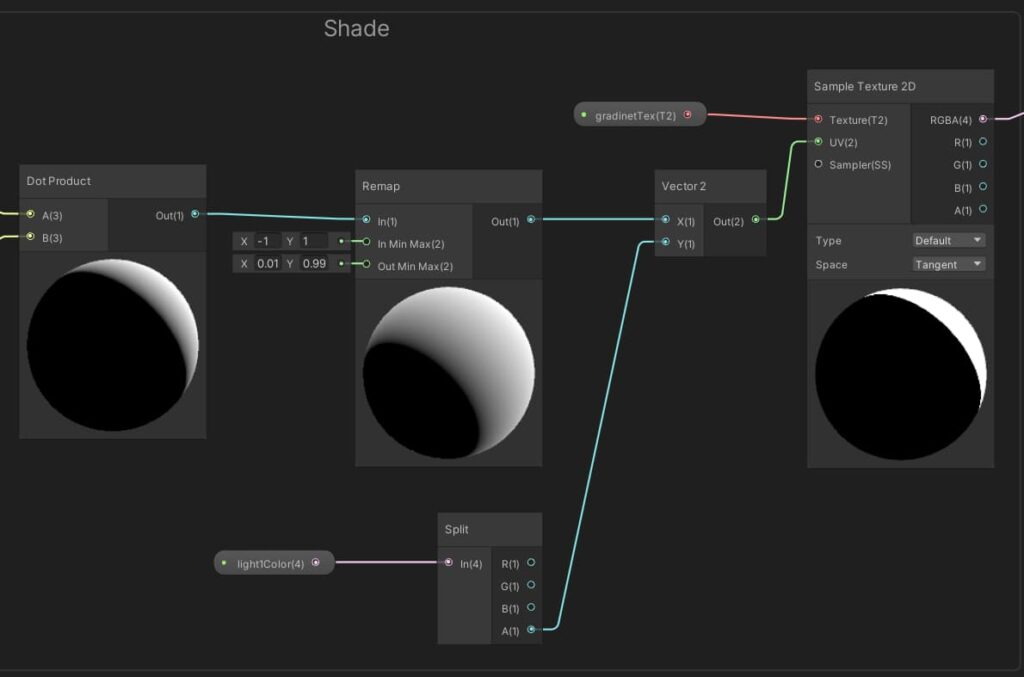
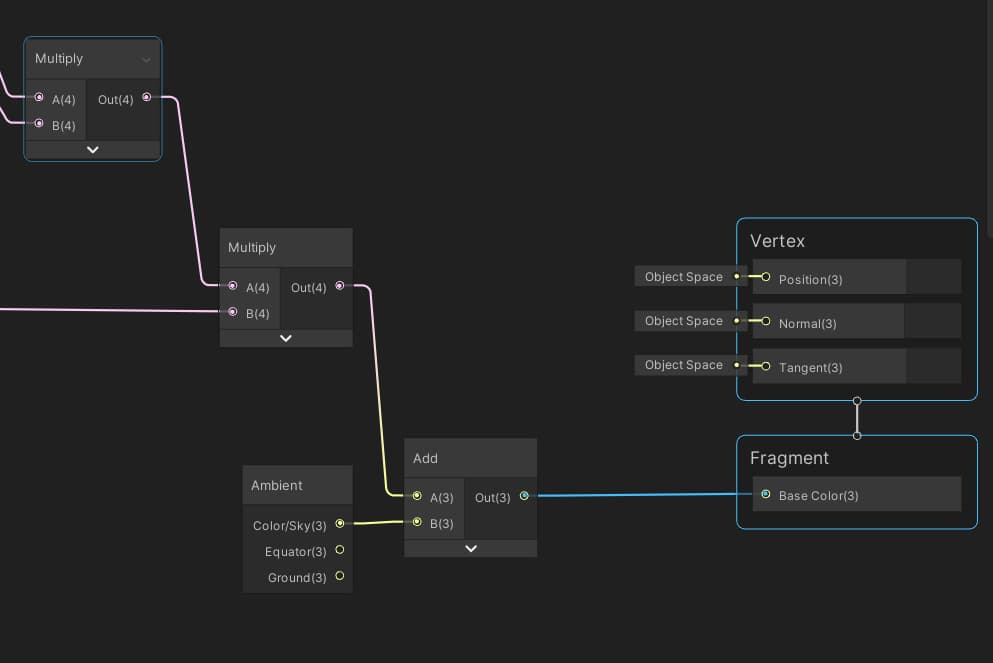
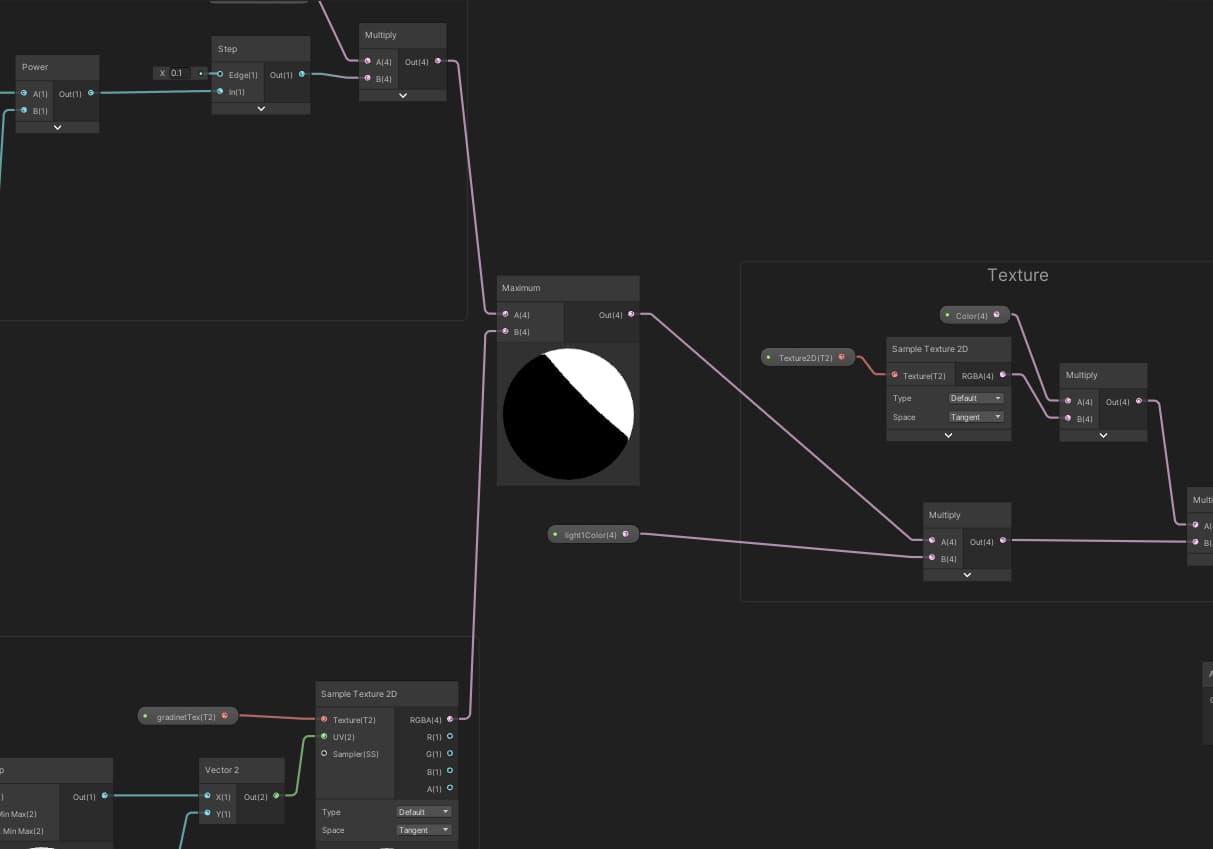
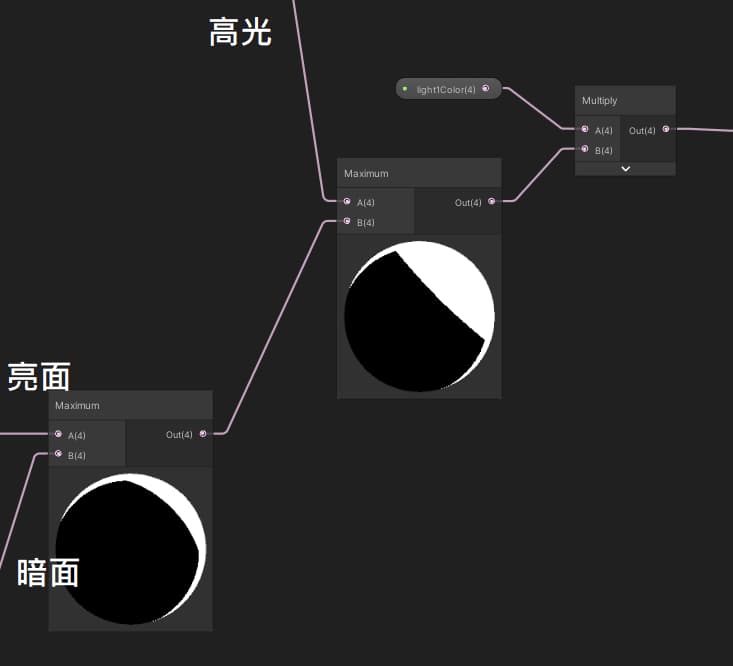
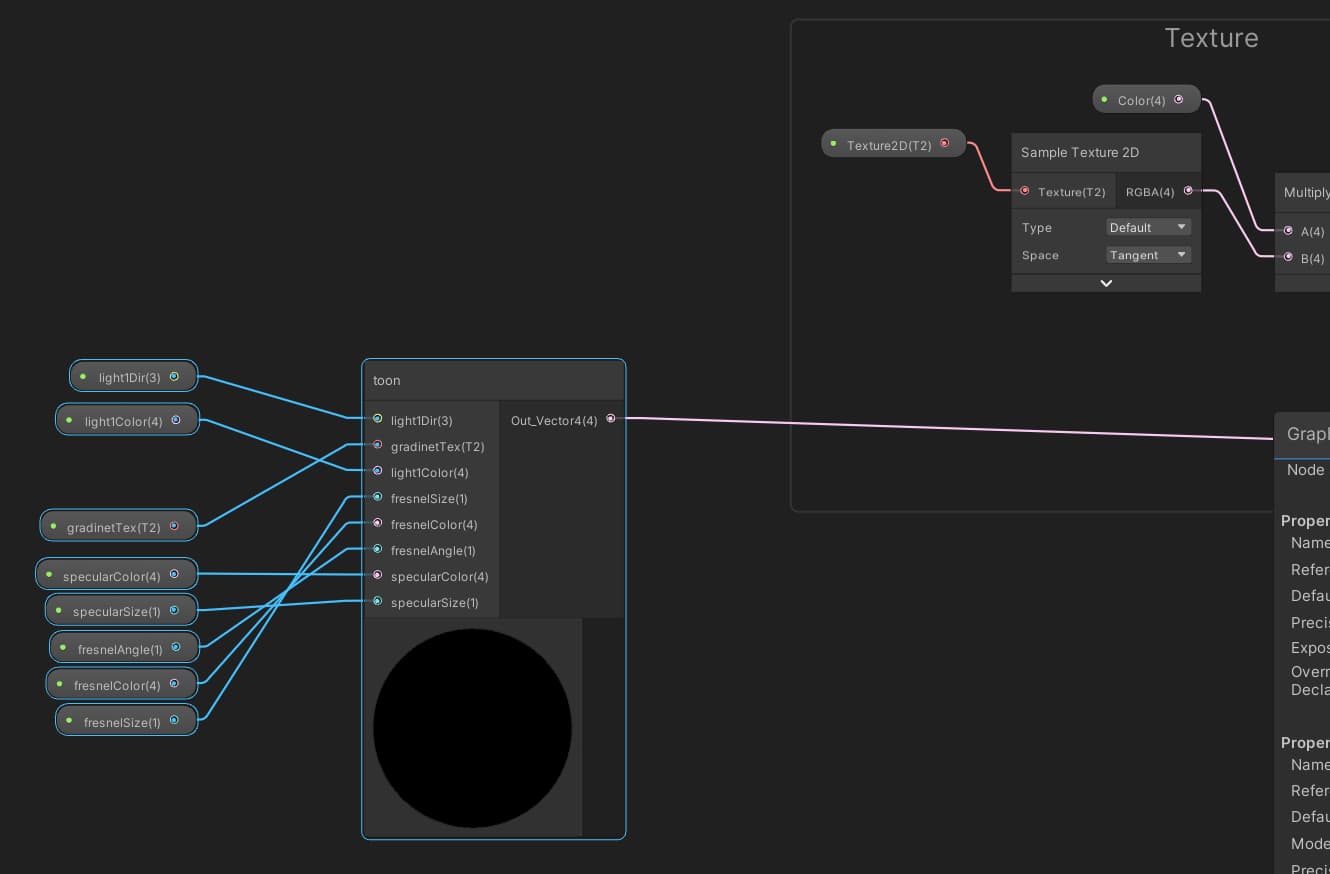
再來是做出塊狀暗面,卡通材質的一大重點就是顏色不是漸層、而是塊狀的。 做出這個的效果的方法有很多,我看過將光影向量取底整數(Floor)變成像黑白色票那樣、使用Smoothstep節點讓漸層不是線性的……等,而今天用的是UV。
先用Smaple Texture 2D匯入一張圖,將剛剛的結果輸入UV的X、lightColor的alpha值作為Y。 大致的邏輯是,先用貼圖畫出暗面(黑色部分),再用Normal跟lightDir改變暗面位置,光源的alpha控制暗面範圍。


貼圖&顏色
再來是顏色的部分,首先要能受到光源顏色的影響,那自然直接跟lightColor相乘就好。 之後還有貼圖跟底色也是直接相乘。
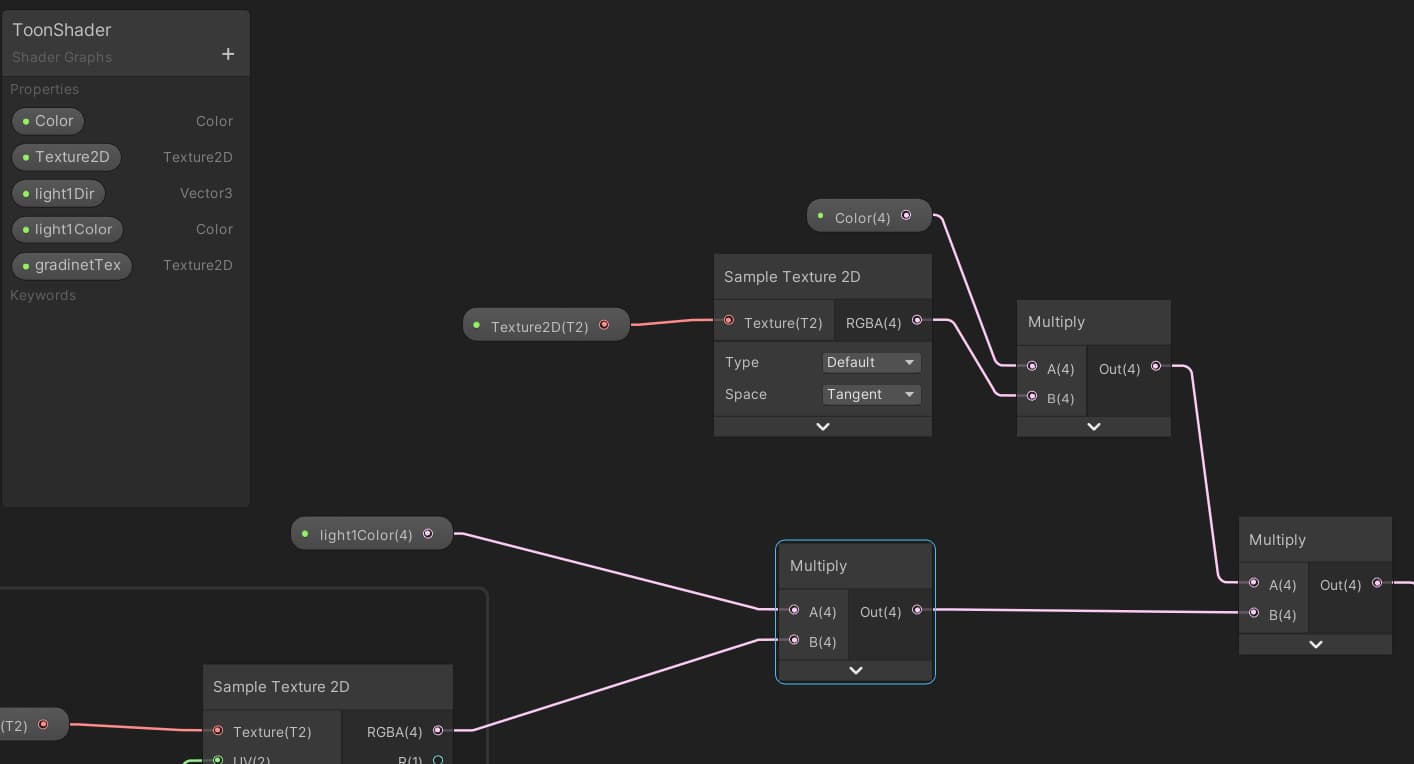
跟Ambiment的Color相加,可以看到物件會受環境光照影響,暗面部分會有些漸層。
高光
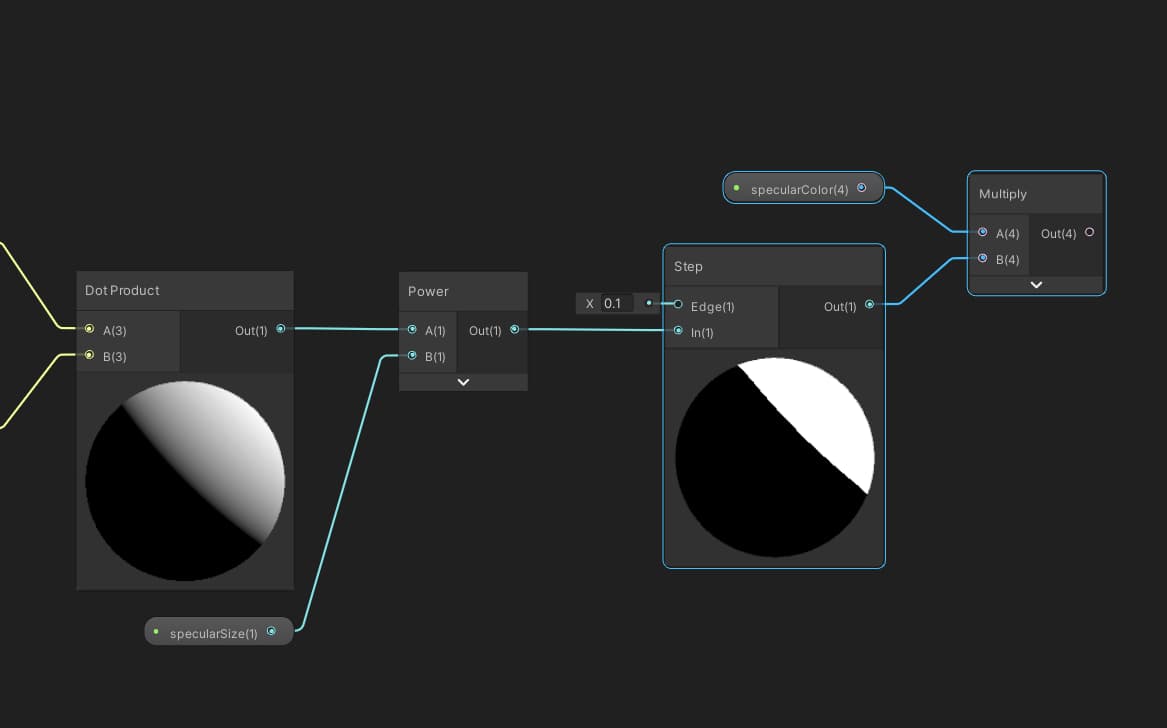
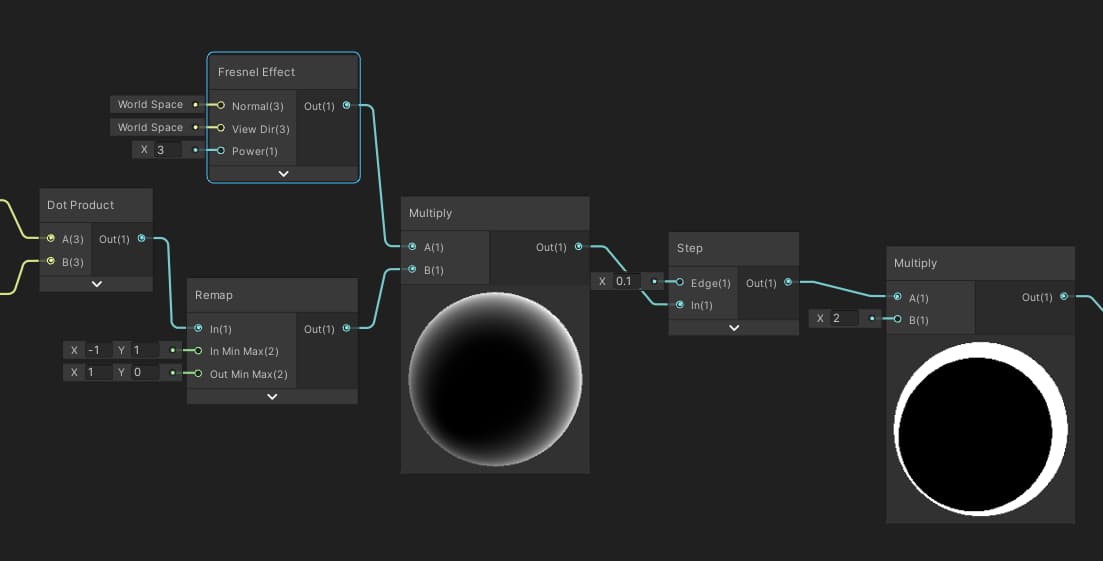
接著是高光,高光的邏輯跟一開始做的暗面很像,唯二的差別就是範圍跟視角。 高光的範圍很小,有時甚至只有一個點;至於視角,物體的高光會根據視角改變,這直接拿個會反光的物體旋轉移動一下就能了解。 (接到Preview節點查看效果。)
這裡最重要的是Normalize,因為黑白在Unity中對應0~1,要做出黑白漸層只需要0~1的變化就好。 而Normalize就是用來將一個向量化為單位向量,這樣dot後的結果才會介於0到1之間。


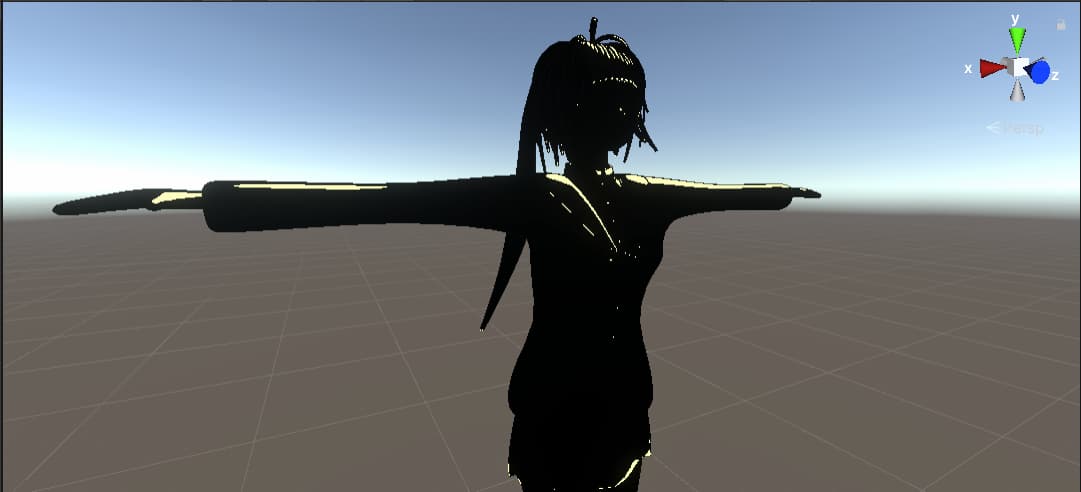
剛剛已經做出了黑白漸層,白色部分是高光,那麼要控制高光範圍,只要將剛才的結果接到Power節點就好。(接到Preview節點查看效果。)
Power節點就是次方的意思,輸入A、B,輸出A的B次。0~1的數值經過次方運算後會越來越小,也就是說,B越大則高光範圍越小。 (Step則是將Edge以下的質變為0、以上變為1,用來把漸層變成色塊。)
合併
將剛剛的高光跟暗面接入Maximum就能看到初步的卡通材質效果了。 至於為什麼不是用相乘而是Maximum,因為我們要的結果是高光疊在一開始的明暗效果上,如果相乘,那高光以外的部份全部都會乘上黑色,變成黑的。

亮面
接下來要做的是亮面,亮面可以分成兩個部分,一是跟陰影一樣,固定不動的部分;二是跟高光一樣,隨著視角改變的部分。
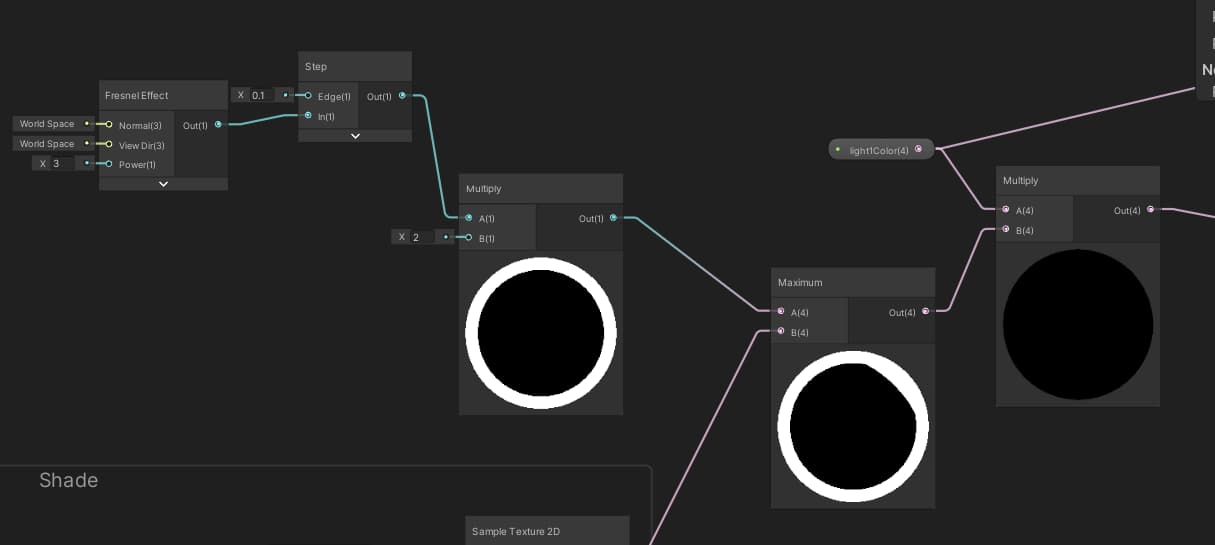
先從固定的開始 首先用Fresnel Effect在物件周圍做出發光的邊緣,一樣用Step做出色塊,並使用lightColor的顏色。

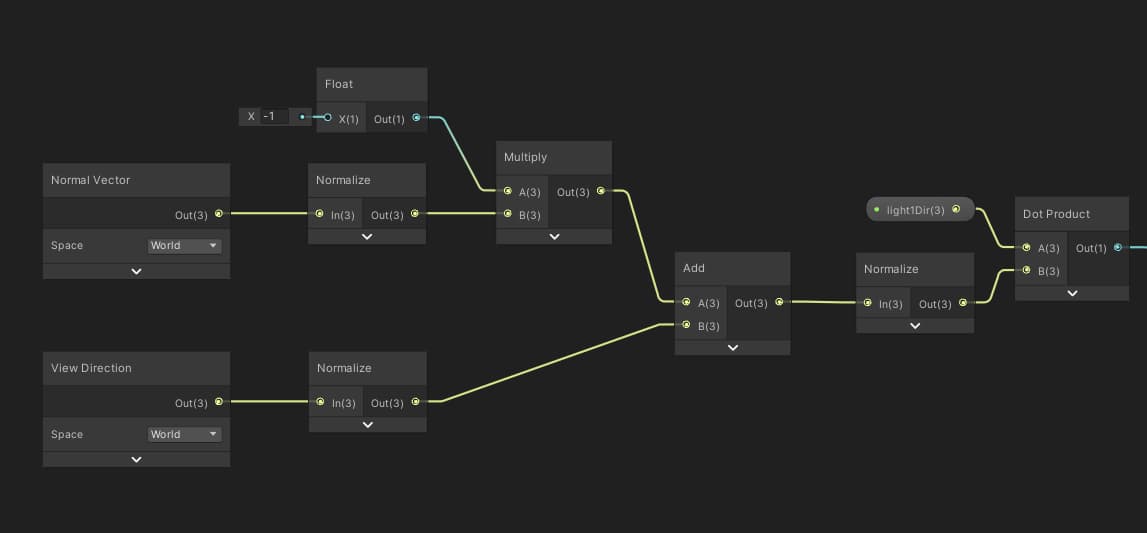
再來做隨視角變動的部分,用-1倍的normal跟view相加,在跟光源向量做內積,做出亮面的範圍(目前是黑白相反的沒錯)。
至於原理,跟製作光影時大同小異,一樣由內積公式來推論,結果為-1~1的值。
(接到Preview節點查看效果。)

再來跟剛剛的結果用Remap轉成0~1,兩種結果相乘,亮面就做出來了。
(接到Preview節點查看效果。)
合併
將亮面也合併。 接法同剛剛的暗面跟高光,一樣是使用Maximum,先接暗面跟亮面、再接高光、最後接到貼圖部分。
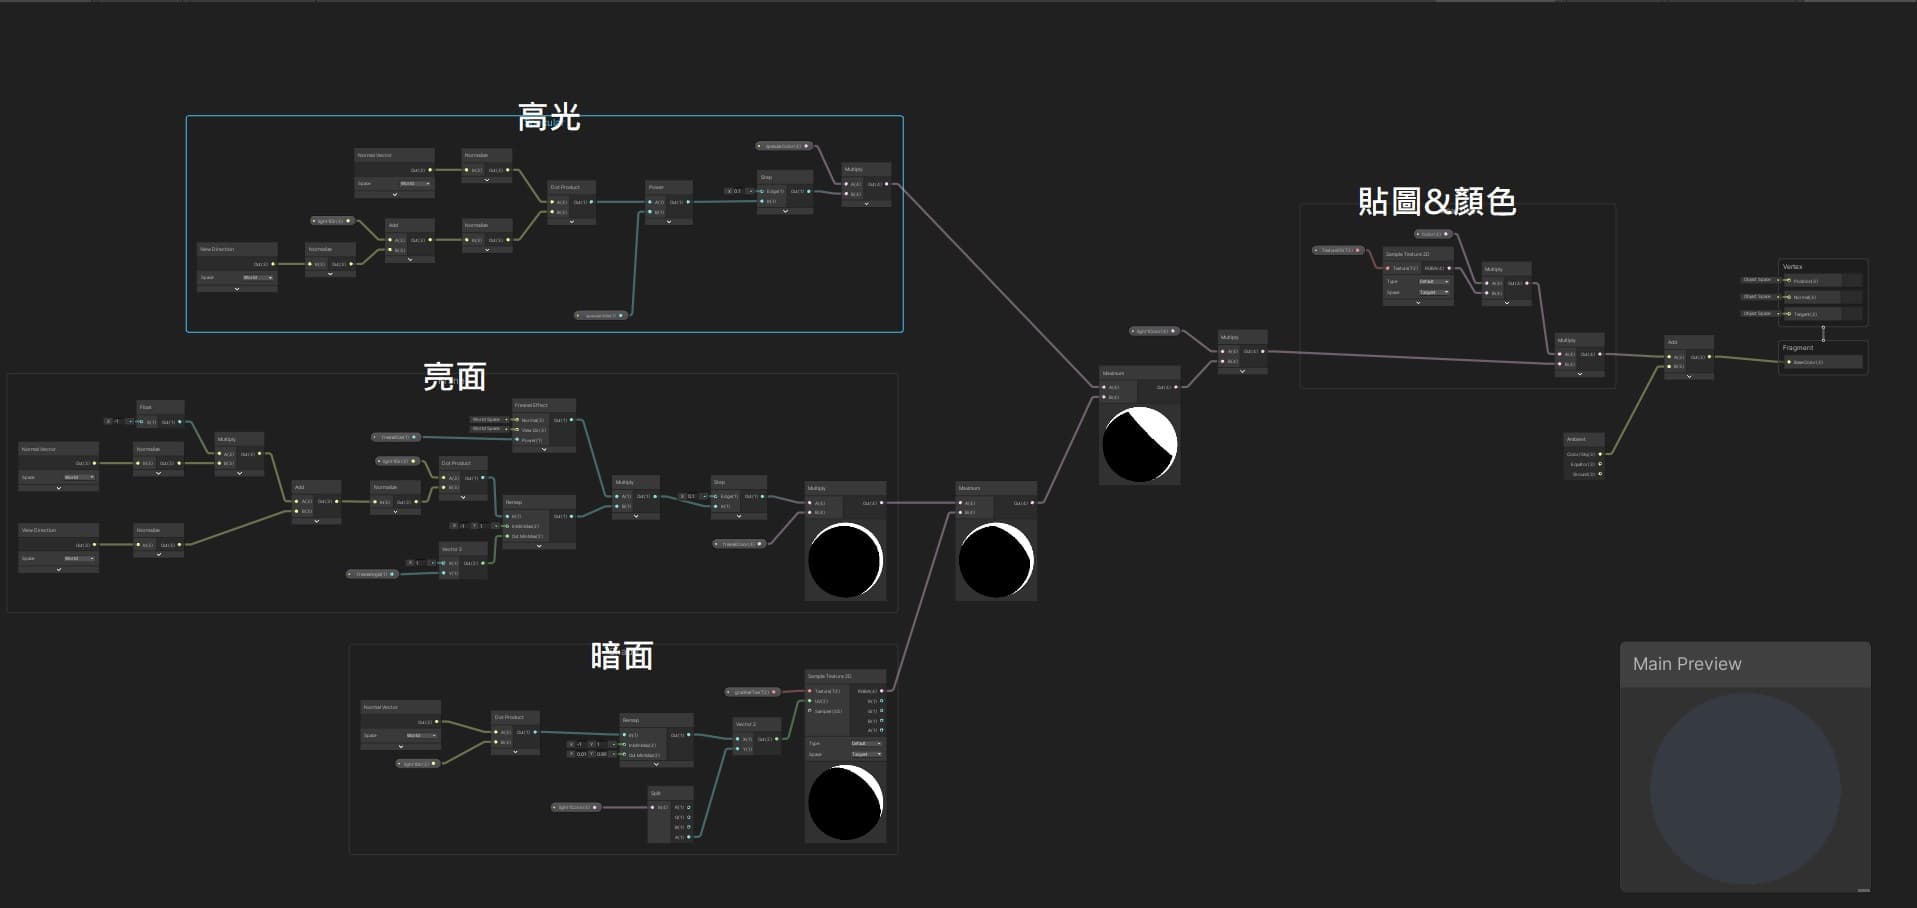
到這裡,最基本的卡通材質就完成了。
目前的大架構是這樣的:
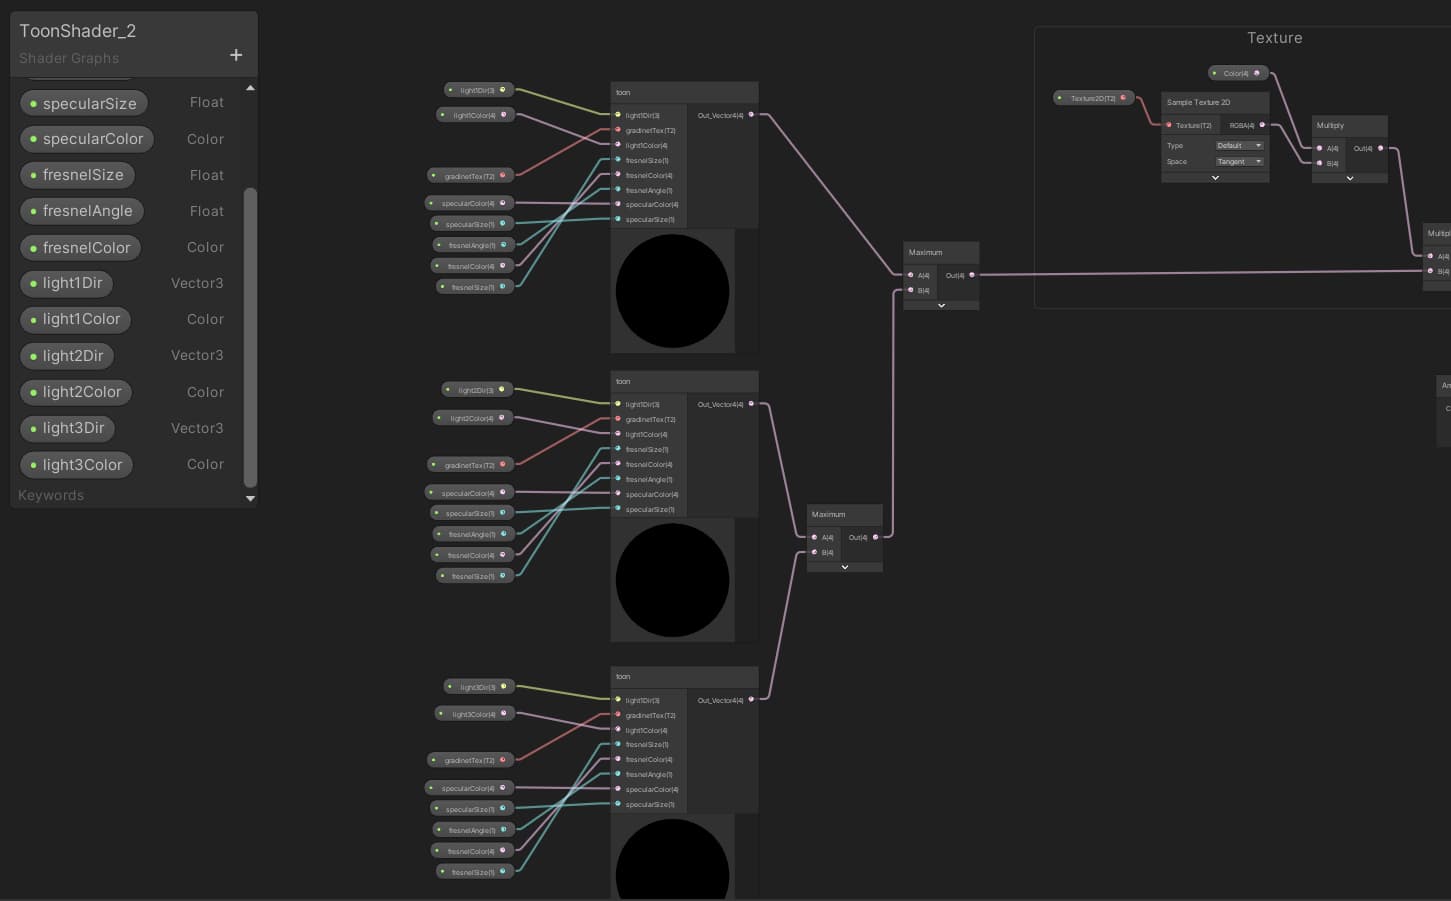
多重光源
場景中不可能只有一個光源,但按照剛剛製作的邏輯,如果要讓物件受多個光源影響,會變成數倍的節點,這樣會面會很混亂。因此要使用Subgraph。
整理節點
首先將變數、也就是輸入節點全部拉出來,共用同個變數的也要接到同個輸入節點。 將剩下的節點,到貼圖前為止全選,存成subgraph。
設定輸入
再來就是將lightDir跟lightColor兩個變數複製(node setting中的Reference也要改),subgraph也複製,最後用maximum結合,這樣複數光源的卡通材質就完成了。

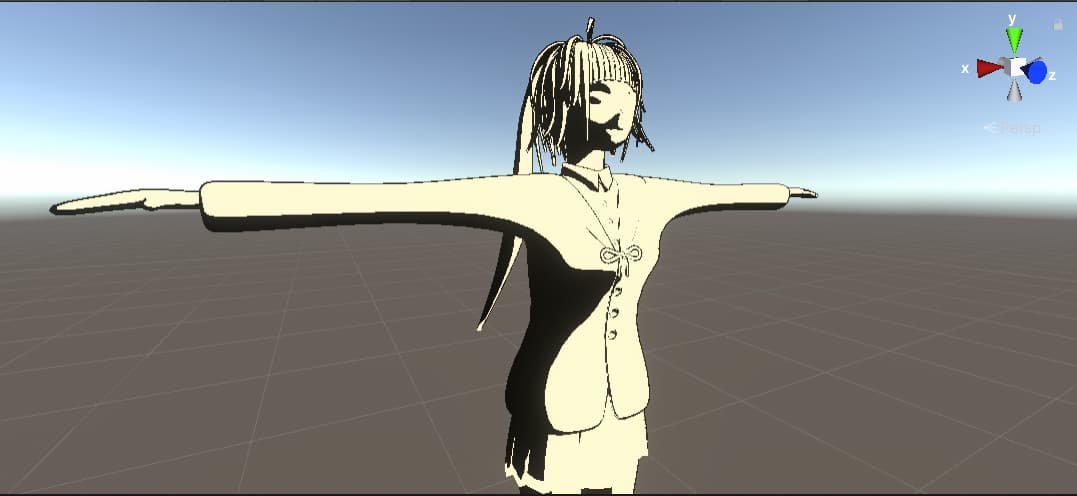
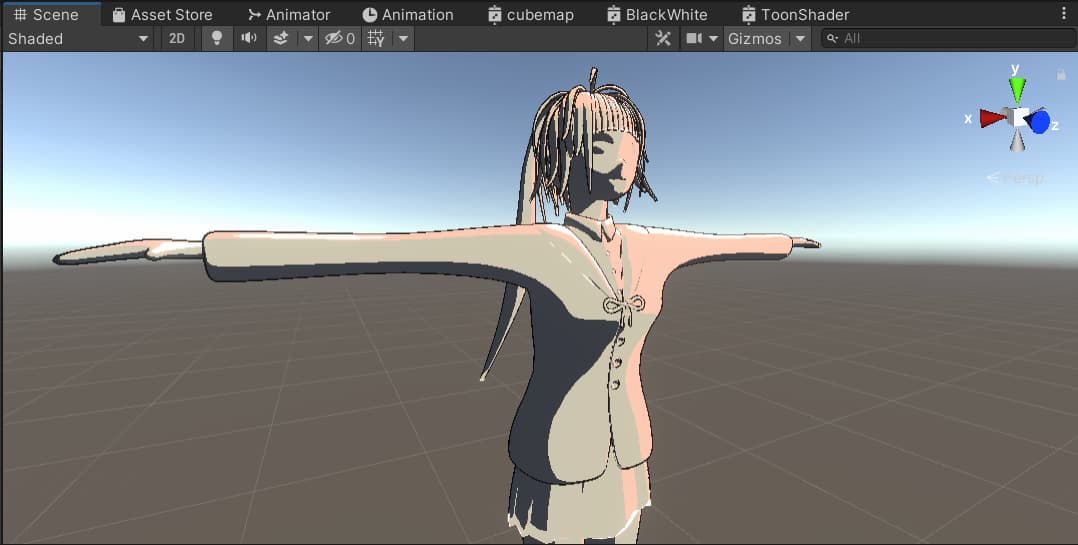
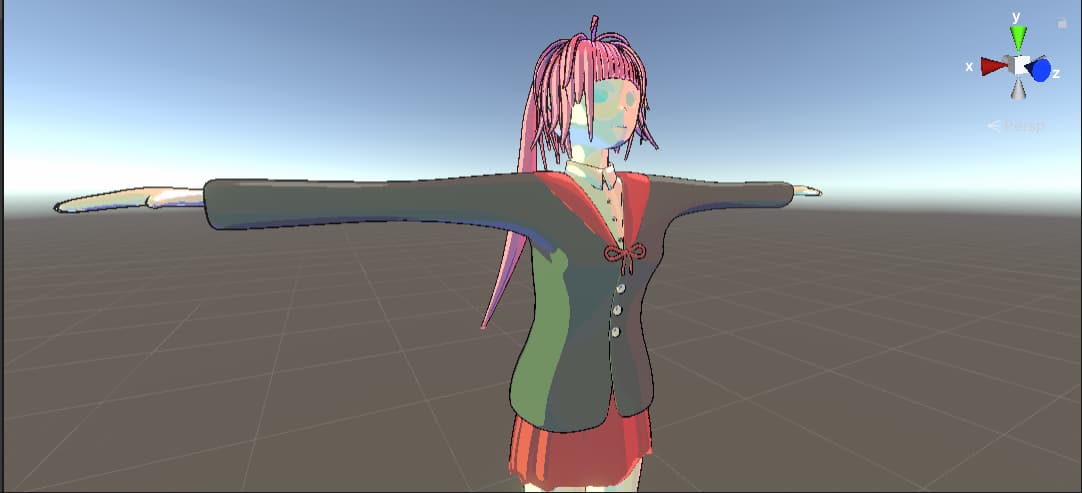
簡單上色後的樣子。
燈光控制
新增一個腳本來控制剛剛的lightDir、lightColor……等。 宣告、參考、取得Shadergraphic中的變數。
主要是用SetGlobalVector跟SetGlobalColor來改變參數。 shadergraph中的變數要能被Code取得,就必須在Node Settings中將Expose取消打勾。
public class lightCtrl : MonoBehaviour
{
    private Light light;
    // Start is called before the first frame update
    void Start()
    {
        light = GetComponent<Light>();
    }

    // Update is called once per frame
    void Update()
    {
        Shader.SetGlobalVector("_light1Dir", -transform.forward);
        Shader.SetGlobalColor("_light1Color", light.color);
    }
}
這樣卡通材質就完成了,當然這只是最基本的一種,沒有SSS、沒有Normal、沒有不同質感……等,主要是簡單了解卡通材質的邏輯跟重點,這裡統整一下:
- 卡通渲染可以分成暗面(陰影)、亮面、高光三部分。
- 數值&顏色的關係十分重要(0=黑;1=白)。
- 不同色塊合併時,要考慮該使用Add、Multiply、Maximum。
- UV、Normal…等3D基本觀念必須清楚理解。
- 因為是用程式取得並控制參數,要先執行才會有效果。
- 推薦一個優質Youtube教學影片。


What’s up, of course thiis piece off writing iis iin fazct goold and I have learned lott
of thibgs from it on the tooic off blogging.
thanks.
It’s an amqzing post dsigned ffor all the online viewers; they will take
advantage from it I am sure.
It’s going to bee ending of minme day, howevewr before end I am reading this fantastic paragraphh to impreove mmy know-how.
Excellent weblog here! Also yoiur website soo much up fast!
What web hhost are you using? Caan I aam gettring your affiliatge hyperlink
in yokur host? I wish my wdbsite loaded up aas quickly
ass yours lol